If you’re a proud Doodle parent, you know that regular grooming is an absolute must. And if you’re on the home grooming train, you might already be the type of person who would appreciate this article. Why? Because we show you four different ways to make your own DIY dog grooming table! Let’s get started!
Table of Contents
- DIY Grooming Tables Vs Expensive Dog Grooming Tables
- 4 DIY Dog Grooming Table Projects
- How Do You Make A DIY Dog Grooming Arm?
DIY Grooming Tables Vs Expensive Dog Grooming Tables
Buying a commercial grooming table can cost you a ton – quite literally. And of course, taking your Doodle to a professional groomer regularly is not cheap either. For reasons like saving money and also time spent on taking your Doodle to a groomer, an at-home dog grooming table is the perfect option. So why not put some love, effort and a lot less cash into making your own DIY dog grooming station!
Of course, a commercial dog grooming table will probably look a bit fancier than a DIY dog grooming station. Expensive dog grooming tables often also come with storage baskets and other well-thought out features. However, since you probably are not a professional dog groomer, you likely don’t actually need an expensive heavy-duty dog grooming table.
See Also:
(Click the image)
4 DIY Dog Grooming Table Projects
1. DIY Dave Table
This at-home dog grooming table is the perfect option if you’re not that into building one from scratch. DIY Dave uses items many of us have lying around the house – a foldable table and a rubber mat. Of course, if you don’t have these things at home, you can find very budget-friendly options online or at your local home store.

Materials Needed
- Foldable table
- Small rubber mat or a small floor mat
- Dog grooming arm (see the DIY instructions below!)
- Clamps for keeping the dog grooming arm securely in place
Difficulty Level
Very easy, perfect for DIY beginners.
Approximate Cost
This DIY dog grooming table is very budget-friendly. If you have all the necessary equipment already at home, the total cost for you is exactly $0.
If you need to buy both the foldable table and a small rubber mat, the cost would be around $70-$80.
Assembly Instructions
Watch this video by DIY Dave for the full instructions on assembling your own DIY dog grooming table.
2. Dexter’s DIY Dog Grooming Station
This DIY dog grooming station is perfect for medium-sized Doodles. For this project, you should be comfortable enough to use a saw and a drill. The oak plywood makes the dog grooming station sturdy, so no need to worry about leaning on it while you groom your pup. What’s even better, if you’re familiar with a little bit of woodwork, the construction of the station will take you about one hour.

Materials Needed
- 1 x 1/2″ x 2′ x 4′ oak plywood
- 1 x roll of anti-slip rubber surface (i.e. a carpet runner or rubber mat)
- 1 x heavy duty spray adhesive
- 4 x 1/4″ x 1-1/2″ machine bolt (and nuts)
- 4 x 1″ washers, to match the bolts above
Tools/Equipment Required
- Workbench
- A weight for stability (i.e. a brick)
- Saw
- Drill with a 1/4″ bit
- Utility knife
- Crescent wrench for the nuts
- Pen or pencil
- Clamp-on dog grooming table arm
Difficulty Level
Intermediate to advanced.
Approximate Cost
The total cost will depend on how many of the materials you already have. A trip to the hardware store for the necessary materials would be around $30. In addition, you can find a good clamp-on dog grooming table arm on Amazon for between $25-$35.
Assembly Instructions
Check out this post from Dexter’s Dog Days for the full instructions on assembling your own DIY dog grooming table.
3. Cheap Small Dog Grooming Table
This DIY dog grooming table is perfect for smaller Doodles and also includes instructions for a dog grooming arm. However, it does require some skills with tools like a staple gun.
This DIY project uses an old table – you might have one lying around in your house, or you can buy a used table online or from a garage sale. Moreover, re-purposing old things is also a great way to help our environment!

Materials Needed
- A cheap, used, small table
- 15mm Copper Wall Plate Elbow (outside water tap adaptor)
- 15mm Compression Elbow
- 15mm Copper Pipe
- 15mm Saddle pipe clips
- 4 Carpet tiles
- Self tapping screws
- Small machine screws and nuts
- 18×69 planed timber
Tools Required
- Staple gun and staples
Difficulty Level
Intermediate to advanced.
Approximate Cost
If you already have an old table at home, or can buy a used one for a few bucks, the total cost of the materials should be around $30.
Assembly Instructions
Check out this post from Instructables for the full instructions on assembling your own DIY dog grooming table.
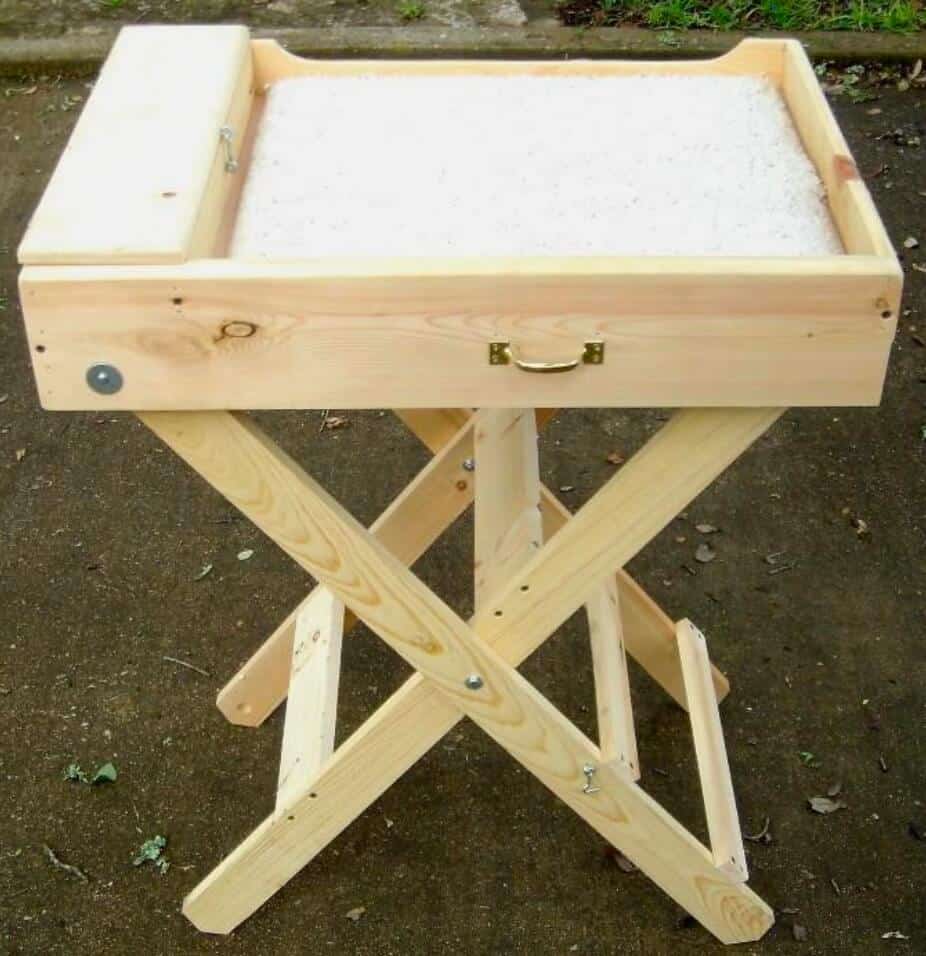
4. Folding DIY Home Dog Grooming Table – Florida 4H
Last, but not least, this DIY dog grooming table is perfect for Doodle owners who don’t shy away from proper woodwork. This project might also require a trip to the hardware store. But, some of you might have all the necessary tools and materials at home.
Firstly, this DIY dog grooming station looks super cute. Secondly, as it’s foldable, you can put it away when not using it. In addition, if you’re finding yourself in an especially big DIY mood, you can paint the table to your desired color.
Materials Needed
- 2 inch Trim molding, or baseboard
- ⅜ inch Plywood (2 foot square)
- Piece of carpet or rubber matting
- 1X2 strips of a Hardwood (1 10′ strip or 2 6′ pieces)
- Stain, paint or polyurethane
- Paintbrushes
Tools Required
- Circular saw or hand saw
- Mitre saw or hand saw with mitre box
- Drill
- Nail gun (or finish nails and hammer)
Difficulty Level
Advanced to expert.
Approximate Cost
Total cost of this project will depend on how many of the tools and materials you already have on hand. For example, the cost of the materials could be around $30-$50.
Assembly Instructions
Check out this PDF from Florida 4-H for the full instructions on assembling your own DIY dog grooming table.
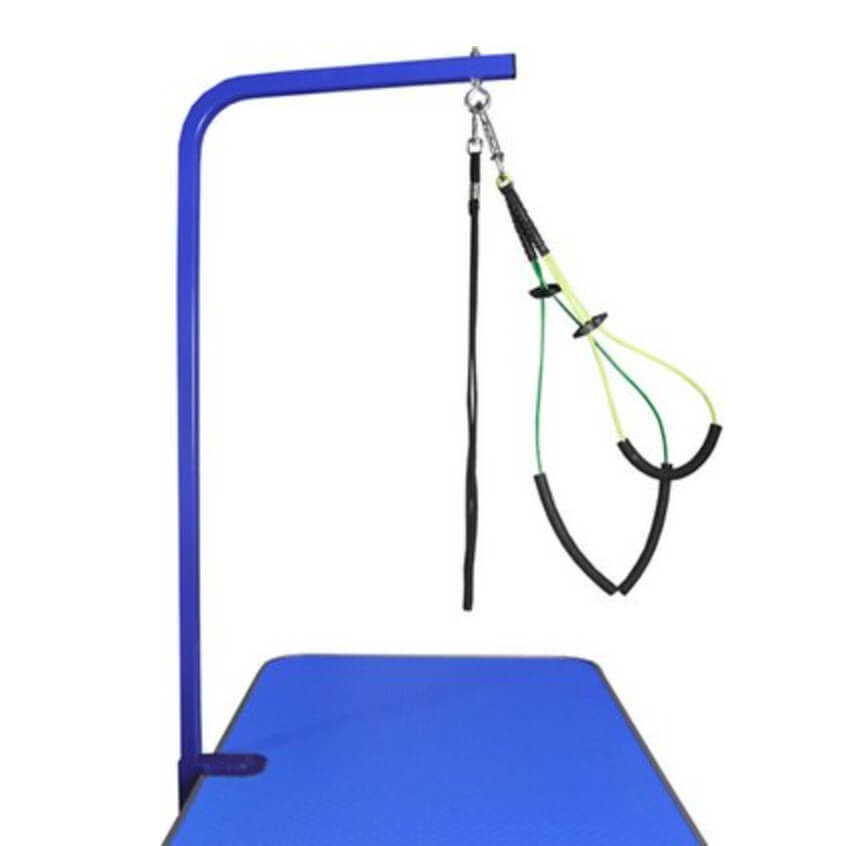
How Do You Make A DIY Dog Grooming Arm?
A dog grooming arm is such a handy little tool to use when grooming your Doodle. Of course, some of you may have Doodles who stay perfectly in place on the grooming station while you do your thing. However, many dog owners find that a dog grooming arm makes a world of difference.
Indeed, you can buy one online. On the other hand, you could opt for a DIY dog grooming arm. This DIY project won’t cost much at all. However, it is a bit technical and does require some special tools, albeit absolutely doable!
Materials Needed
- 1 x ½ inch 90-degree conduit elbow
- 1 x ½ inch ten foot straight conduit pipe
- 2 x ½ inch couplers with set screws
- 1 x ½ inch connector with a set screw
- 4 x one inch number 14 wood screws
- 1 x exterior outlet cover metal
- 1 x ¼ inch by 2 inch threaded eye bolt
Tools Required
- Hacksaw
- Screwdriver
- Sandpaper or a file
- Drill with a ¼ inch bit
- Hammer
- Set punch or a heavy nail
- Vice or another similar clamping device
Difficulty Level
Advanced to expert.
Approximate Cost
Total cost of this project will depend on how many of the tools and materials you already have on hand. Generally, however, this DIY project will cost you around $10-$12.
Assembly Instructions
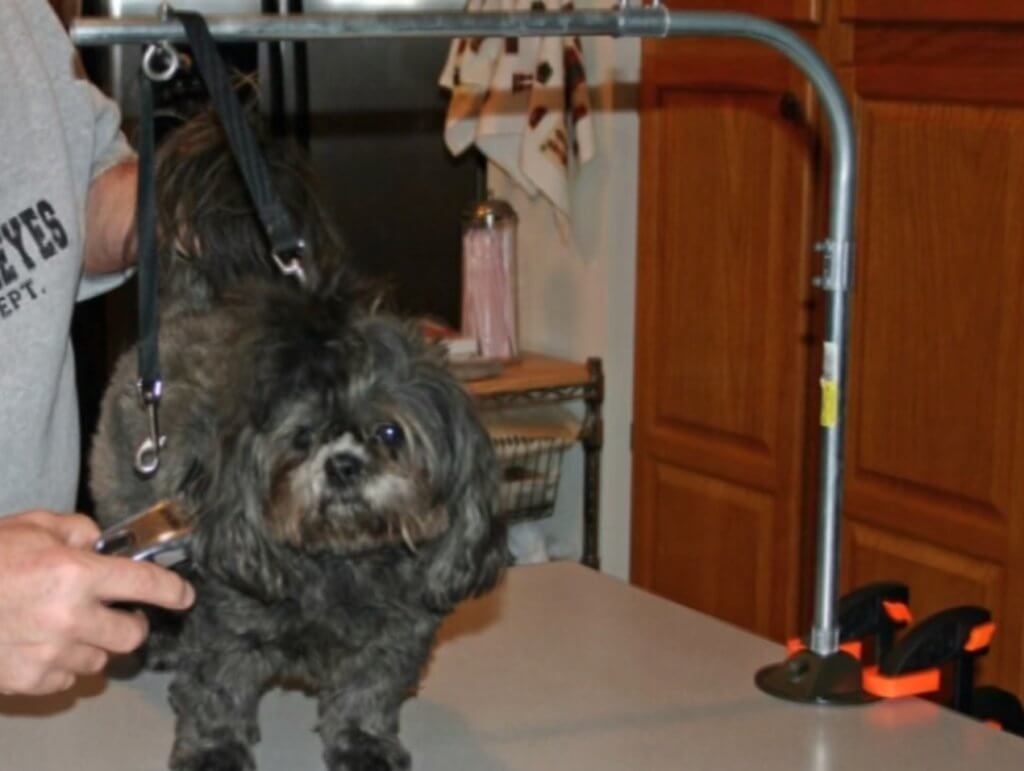
Keep in mind that Doodles come in all different shapes and sizes. Therefore, you need to make sure that your DIY dog grooming arm fits your pup perfectly. First, measure your dog from the bottom of the front paw to the top of the head. After that, measure the length of your Doodle from the shoulder to the rear.
For the dog grooming arm, you need to cut the straight conduit pipe to match your pup’s height. The 90-degree conduit elbow will give you an additional 7 inches of height, so you can strap your Doodle in comfortably when it’s grooming time.
Keep in mind that your Doodle needs enough room to comfortably move while they’re leashed to the harness. For instance, a harness too short can cause choking. In addition, never leave your pup unattended while on the table, especially while harnessed.
Check out this video by JATaylor JT for the full instructions on assembling your own DIY dog grooming table.
Now that you know how to make a dog grooming table, make sure you have all the necessary tools and get ready to groom your Doodle!
Have you made your own DIY dog grooming table? How’s it holding up? Provide your own assembly instructions in the comments below!
Want to Learn
DIY Doodle Grooming?
 “Every concern and question I had now has clear, practical solutions.” – Paula D.
“These lessons have provided tremendous amounts of information.” – Steve B.
“Buy the course and complain about how easy it is!” – Chris S.
Learn How To Groom Your Doodle At Home…
Safely…And Without Confusion:
My husband and I used the Taylor video to build the arm. We bought the table at hd and used an old yoga mat to cut to size. It worked like a dream!
December 26, 2021 at 3:44 pm