As a Doodle owner, I’m sure your top worry when it comes to grooming is whether your Doodle will ever need to get shaved. Now, we know all too well the risk of tangles and mats in Doodles. However, I’m here to convince you that there is one very overlooked issue that can potentially cause more problems in the long run. And that is…overgrown nails. Luckily, as Doodle owners who basically have our groomers on speed-dial, any severe side effects of long nails are very unlikely to happen. Regardless, in the video below, we’re going to teach you how to grind dog nails easily to keep your Doodle’s feet happy and healthy in between visits to the groomer. Let’s get started!
Table of Contents
- What Happens When Dog Nails Get Too Long?
- How Do I Know If My Dogs Nails Are Too Long?
- How Long Should Dog Nails Be?
- How to Choose a Dremel
- How to Grind Dog Nails With a Dremel: Steps
What Happens When Dog Nails Get Too Long?
So what happens if you don’t cut your dog’s nails? It’s a common question that every dog owner needs to know the answer to. First and foremost, long, overgrown nails can cause a significant level of pain and agony. When a dog has long nails, the simple act of walking can cause a lot of uncomfortable pressure on his toes, which results in very sore feet. Long dog nails also affect posture alignment causing constant pressure and distress on the feet and legs.
How Do I Know If My Dogs Nails Are Too Long?
Now, if you hear the clickety-clack of their nails on a hardwood floor or sidewalk, your Doodle’s nails are already too long. At this point, you need to take action and trim those babies. And If his nails have started to turn sideways, they should’ve been trimmed yesterday.
How Long Should Dog Nails Be?
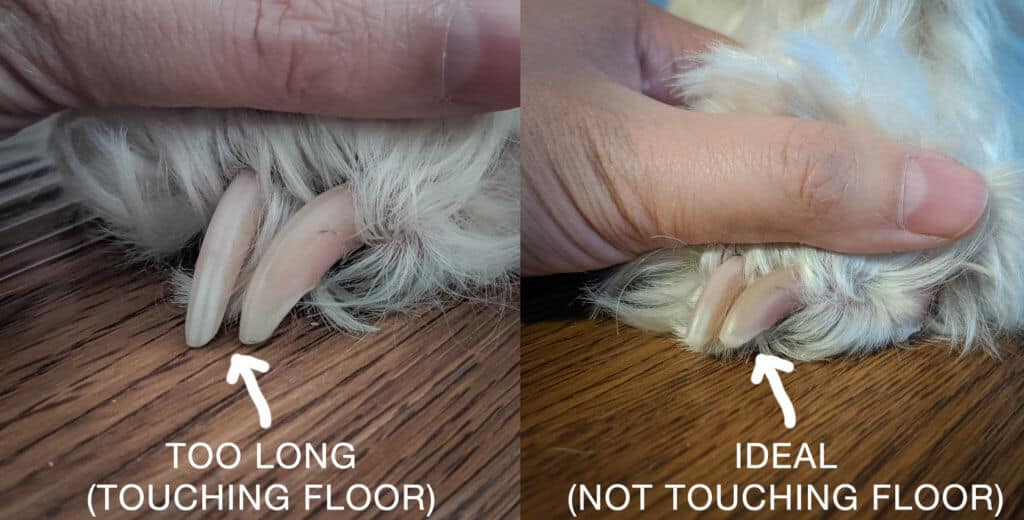
That said, healthy length dog nails should not touch ground when they are standing in an upright position. You should not be able to hear the nails clicking when your Doodle is walking on a hard floor, and they definitely should not be so long that they turn sideways.
If your Doodle has a while until his next visit to the groomer, or if you’ve committed to DIY grooming, you might be wondering how to grind dog nails at home.
With ease…and patience!
In the video below, we’re specifically going to demonstrate how to grind dog nails with a dog nail grinder. In most home groomers’ experience, using a nail grinder is much easier for everyone involved, but if you want to learn how to trim dog nails with a nail clipper, check out this article.
How to Choose a Dremel
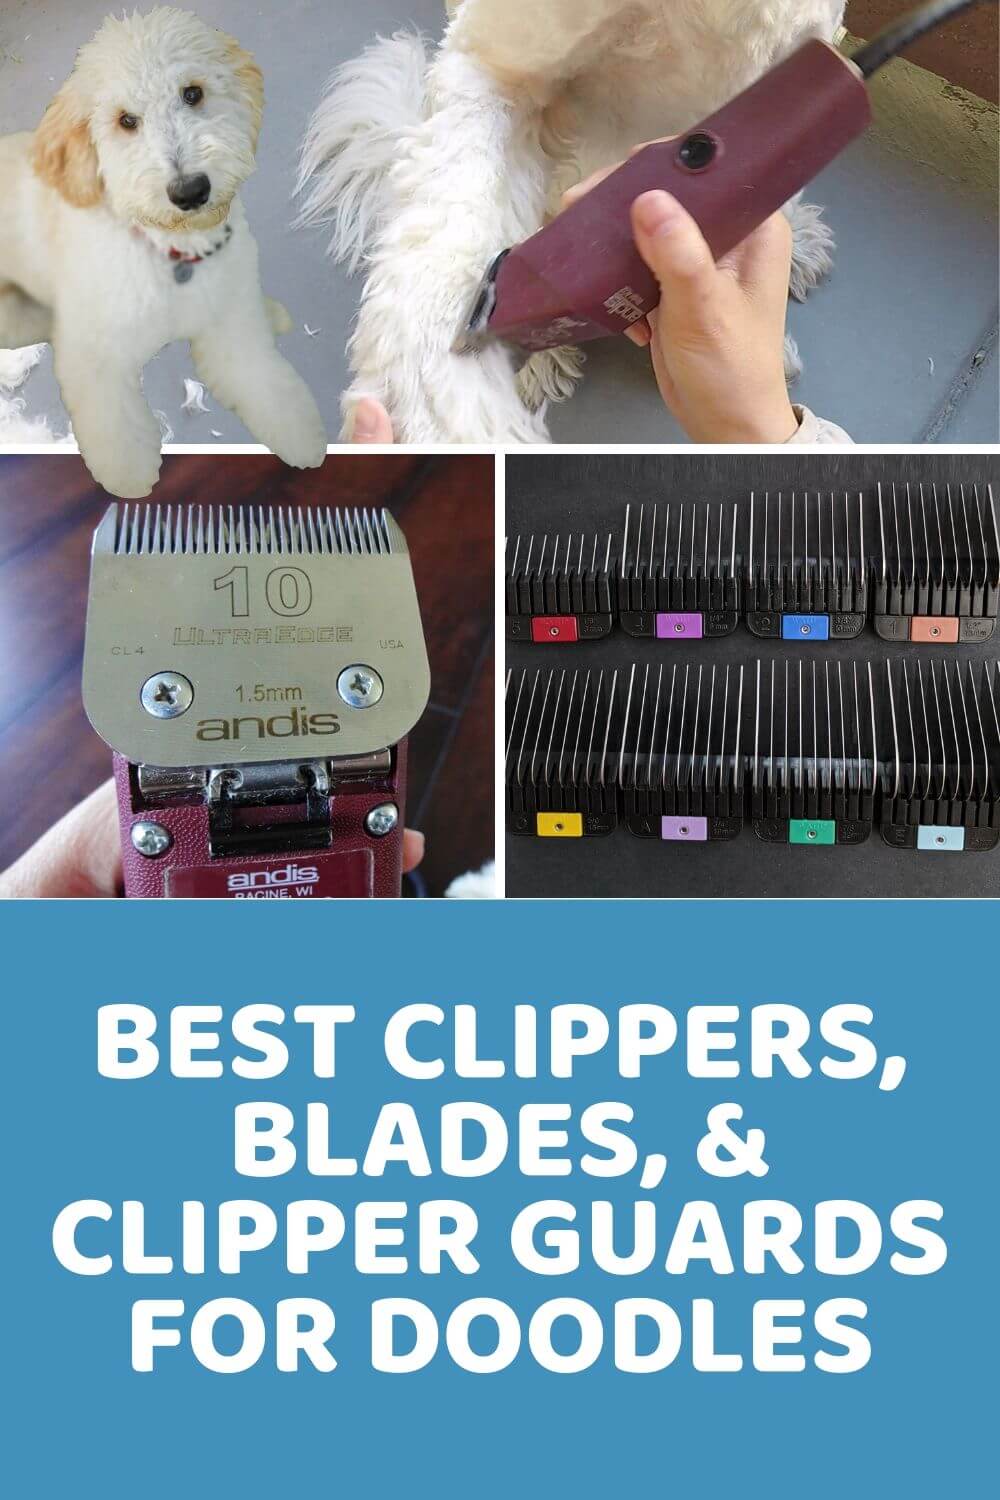
So a dog nail grinder is essentially an electric, motorized nail file. Apparently the only dog nail grinder tool that professional groomers recommend…is not even a dog nail grinder, but is actually a Dremel-brand rotary tool. So if you’re in the market for one, be sure to check out the following models and accessories they recommend.
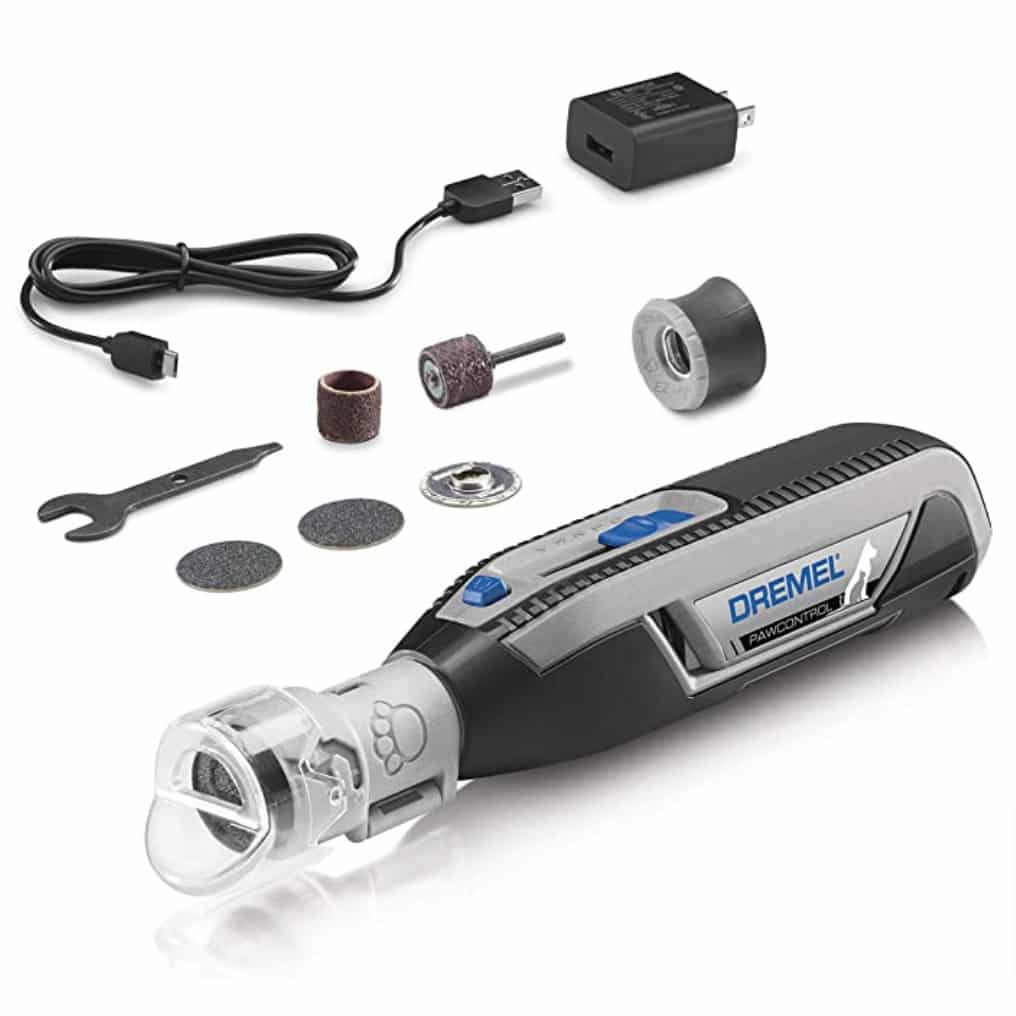
You can also consider the following aspects when purchasing a Dremel:
- It must have variable speed settings, with the lowest speed at 5000 RPMs and the highest speed in the range of 20,000-30,000 RPMs. You will be grinding the nails anywhere between 5000-12,000 RPMs, but Dremels that aren’t capable of higher speeds are often low quality.
- Avoid nail grinders that are branded “for pets”. Get a good Dremel and use the lowest setting (5000 RPM). Low quality “dog nail grinders” vibrate, are loud, lose power over time, and what you can get done with 12,000 RPM on a good Dremel is noticeably different than what gets done at that same RPM on a poor quality nail grinder.
- If you want to practice first, use a Dremel sanding band with 240 grit. With 240 grit you will simply polish the nail and not quick your dog.
- For real nail trimming, use a 120 grit sanding band.
In the video below, we do not use a Dremel. We use a FURminator brand dog nail grinder. According to groomers, anything but a Dremel is garbage, but it does the job and we’re not going to go out of our way to buy something we already have.
(I will admit, though, that the FURminator nail grinder is literally garbage, and we have since bought a Dremel.)
Anyway, let’s get into the demo!
How to Grind Dog Nails With a Dremel: Steps
Be sure to watch this video to follow along!
Step 1) Acclimate Your Dog
The first step is probably the most important step of all in how to grind dog nails. You really have to make sure your dog is calm and aware of what’s about to happen. Let him see all the tools, let him smell them, and let him acclimate to the sound of the dog nail grinder. You can also start giving treats now to reinforce calm behavior.
Also, use this time to practice handling your dog’s paws. Be gentle yet firm to simulate real life handling during nail trimming. We do this to help him become increasingly comfortable with his paws being touched and handled before the actual nail trimming begins.
Step 2) Position Your Dog
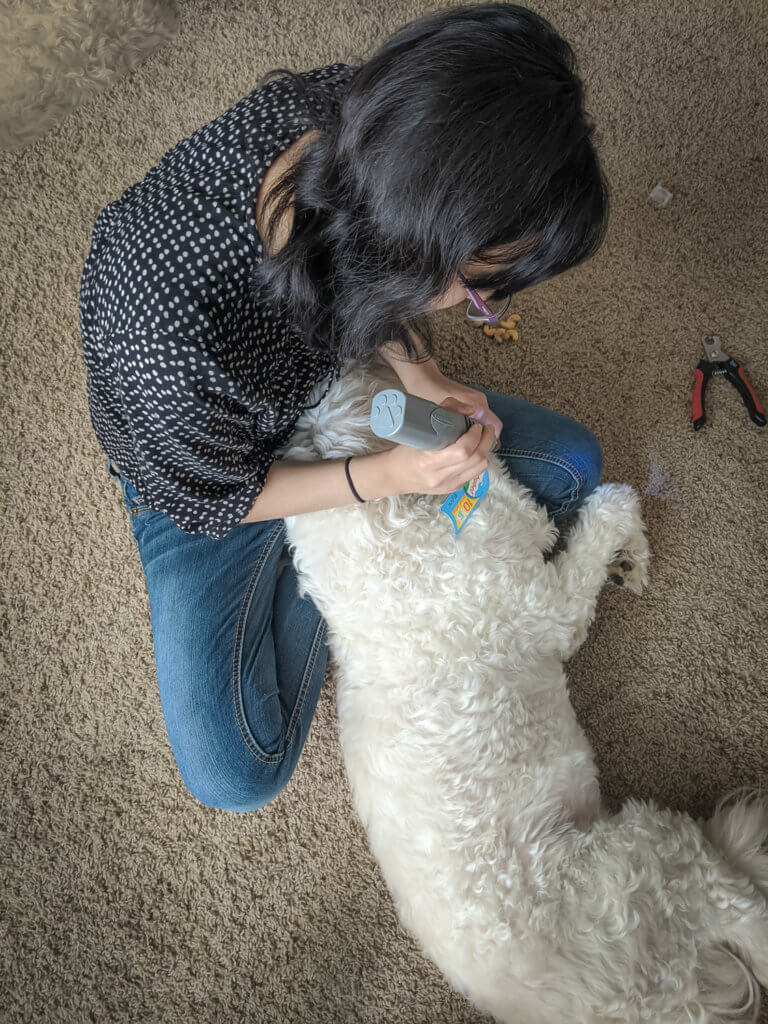
Nail trimming is easiest when the paw pads are facing upward. Each dog has his own limit of comfort when it comes to nail trimming. Some dogs are fine to sit or stand, while others prefer to be laying down, or even laying upside down in the comfort of their owner’s lap. Any which way is fine, as long as it’s comfortable and effective for the both of you.
Step 3) Use a Mesh Bag as a Hair Guard
Since most Doodle’s have hair that is notoriously long, a wonderful trick is to use a mesh bag as a hair guard to keep the hairs free and clear of the nails so that you have clear access for trimming. Simply slip pup’s paw into the bag and align his nails comfortably into the holes of the mesh.
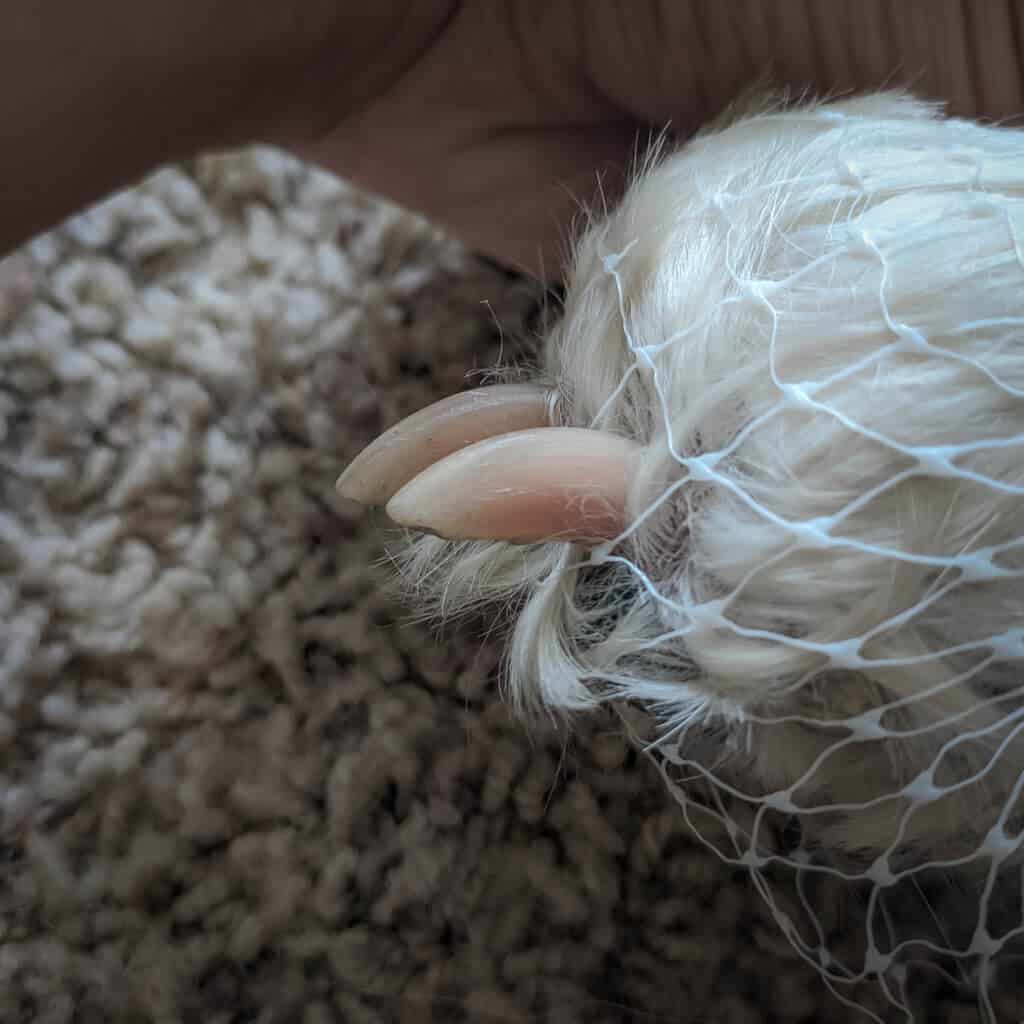
As a safety note, long hair can get caught and tangled very quickly in a Dremel, so be sure to use a hair guard on your Doodle, as well as tying your own hair back if applicable.
Step 4) Begin Grinding the Nails
Now for the action. Let’s walk you through the actual process of how to grind dog nails.
Hold the paw and press gently at the base of the toe with your thumb and index finger to spread the toe outward. Begin to trim each nail with the Dremel.
Apply the Dremel to the nail with a quick swiping motion. Never tap the Dremel to the nail. The Dremel bit can heat up and burn the dog if kept in place for more than 1-2 seconds. So be sure to lift it off the nail very frequently.
Also, hold the base of the nail to minimize vibration. This is the most effective way to provide comfort for your dog.
In terms of how short to grind your dog’s nails, aim first for your dog’s nails to be off the floor when standing upright. See the image near the top of this article for reference. Then, aim for no clicking when he is walking. Of course, these goals depend first on whether your dog’s quicks are receded enough to allow shorter trims. You can learn more about how to recede quicks here.
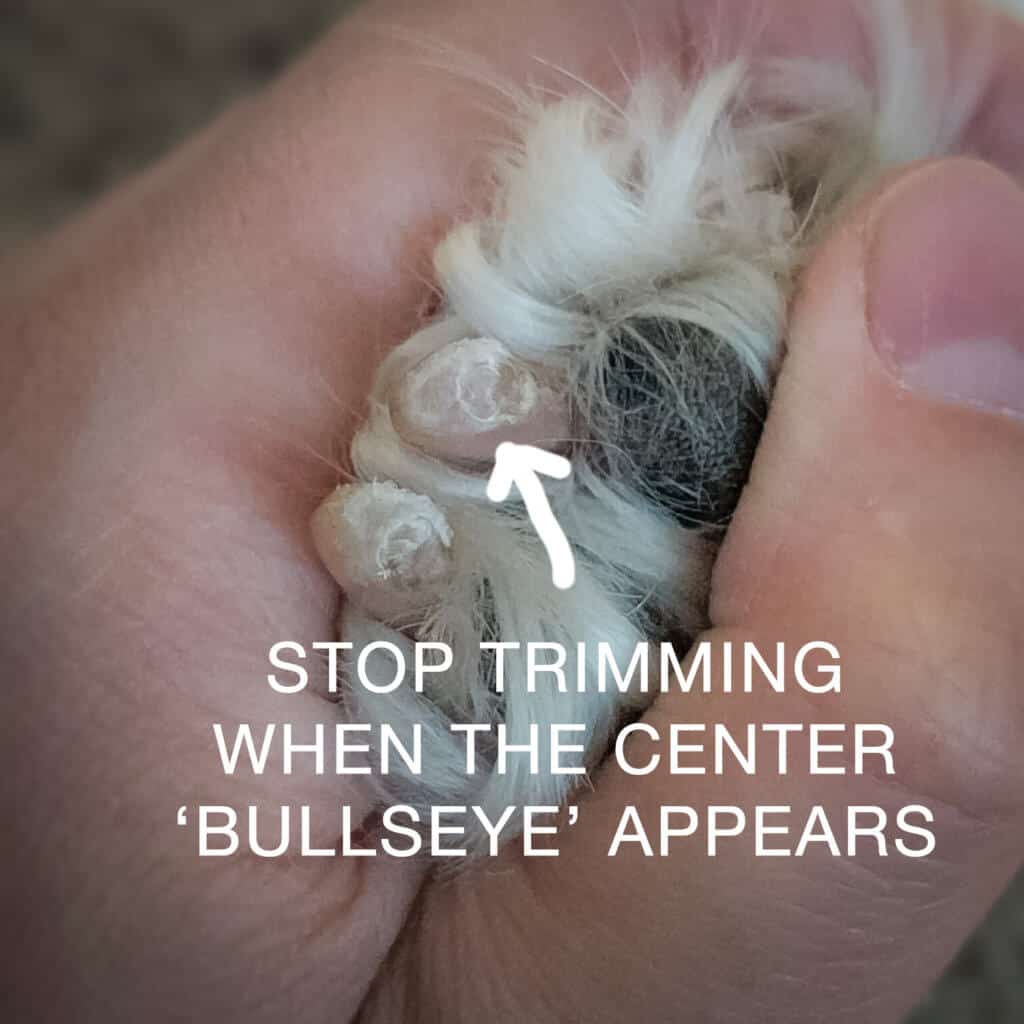
Keep a close eye on the nail and check it frequently as you grind it down. Once you see a “bullseye” in the center of the nail, stop grinding! This means you are getting close to the quick. This goes for both clear and black nails.
If you hit the quick, it will start to bleed. You can learn more about how to handle bleeding quicks here.
In the end, you should aim for a nail that is nice and rounded, shortened, and off the floor when your dog stands upright.
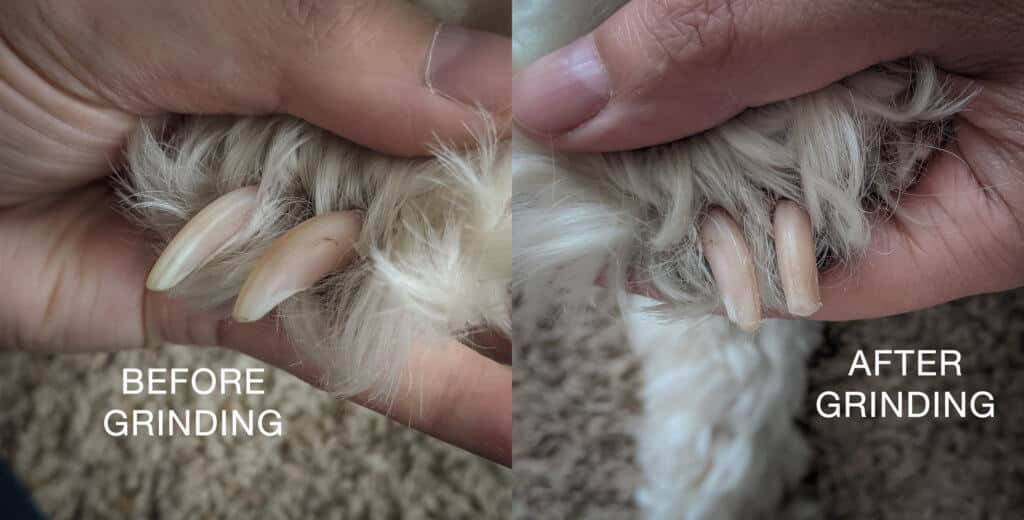
So there you have it! I hope you can use this guide on how to grind dog nails with confidence.
Let us know in the comments if you grind your dog’s nails and what other products or tricks you recommend.
Learn How to Stop Shavedowns For Good & Keep Matting At Bay!

Discover the PROPER Doodle coat care routine that gets your pup to cooperate…helps you nip tangles in the bud…and gets groomers to do exactly what you want.
Plus, get $520 worth of Bonus Materials for FREE, including:- Doodle Parenthood Community and Support Group ($190 value)
- Custom Doodle Coat Care Plan Lifetime Access ($75 value)
- Easy to Use Doodle Grooming Tracker ($20 value)
- And MORE!
The information on this page is for informational purposes only. It is not intended to be a substitute for professional groomer advice. Always seek the advice of your groomer, veterinarian, or other qualified animal health provider with any questions you may have.



I’ve had vet trim my doodle’s claws from the get go. 2 weeks ago I asked them to Dremel, and I was told that they no longer do that as too many problems can result. I’m sure my noise averse pup is glad she doesn’t know what she missed. Vet is happy to have us drop in anytime for pawdicure clippings (for a fee).
October 6, 2021 at 3:39 pm